Clear Cache in WordPress: A Step-by-Step Guide
Introduction
In today’s fast-paced digital world, having a website that loads quickly is crucial for retaining visitors and improving search engine rankings. WordPress, being one of the most popular content management systems, can sometimes become sluggish due to cached data. Clearing cache regularly is essential to ensure optimal performance and provide a seamless user experience. In this article, we’ll dive into the importance of cache and provide a comprehensive step-by-step guide on how to clear cache in WordPress.
What is Cache and How Does it Work?
Cache is a temporary storage space that stores data to reduce load times and improve website performance. When a user visits your WordPress site, certain data is stored in their browser or server. The next time they visit, the site loads faster since the browser or server retrieves data from the cache instead of fetching it from scratch.
Benefits of Caching in WordPress
Caching offers several advantages, including faster page load times, reduced server load, better user experience, and improved SEO rankings. By reducing server requests and bandwidth usage, caching can significantly enhance website speed.
Clearing Plugin Cache
To clear the cache in WordPress, you’ll typically need to use a caching plugin, as WordPress itself doesn’t have built-in caching features. The steps to clear the cache may vary depending on the caching plugin you’re using. Below are the general steps for some popular caching plugins:
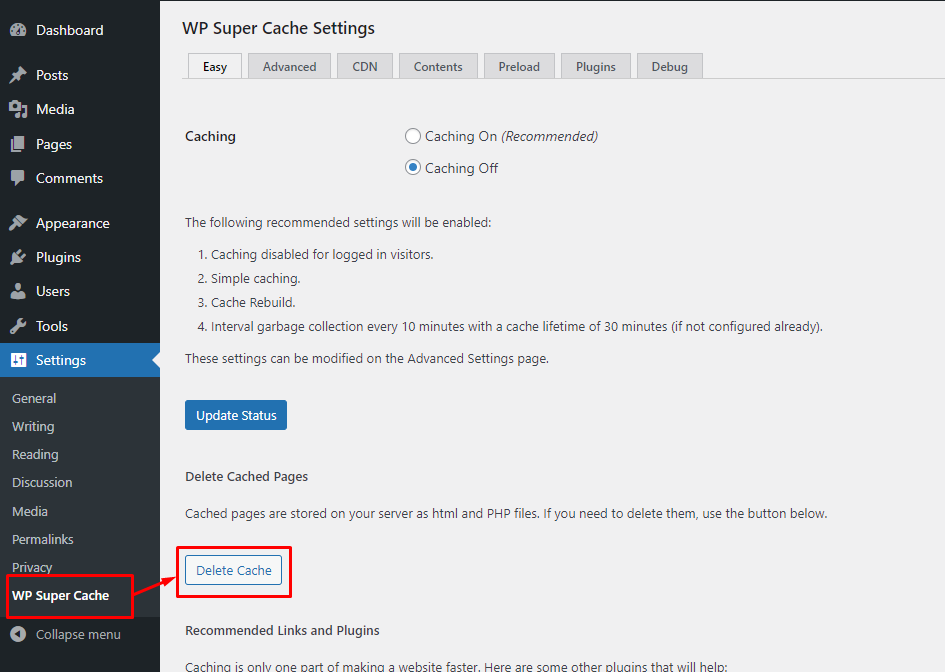
- WP Super Cache:
- Go to your WordPress dashboard.
- Navigate to “Settings” > “WP Super Cache.”
- Click on the “Delete Cache” button.
- You may also need to disable caching temporarily by selecting “Caching Off” in the plugin settings.
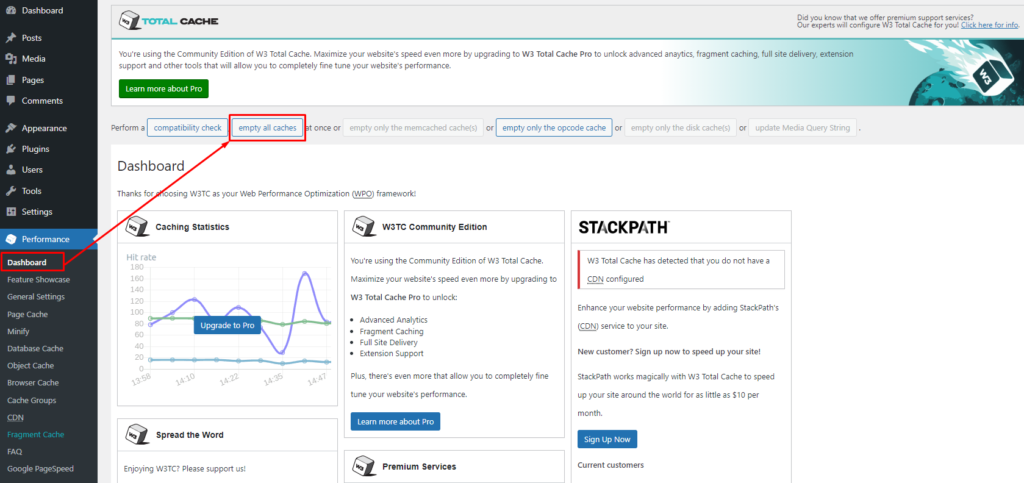
- W3 Total Cache:
- Go to your WordPress dashboard.
- Navigate to “Performance” > “Dashboard” (or “Performance” on the left sidebar).
- Click on the “Empty All Caches” button.
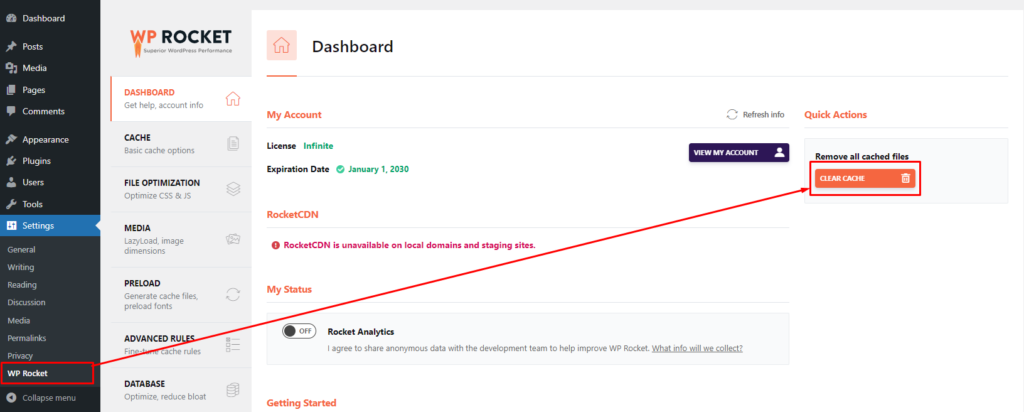
- WP Rocket:
- Go to your WordPress dashboard.
- Navigate to “Settings” > “WP Rocket.”
- Click on the “Clear Cache” button in the top bar of the settings page.
- Cache Enabler:
- Go to your WordPress dashboard.
- Navigate to “Settings” > “Cache Enabler.”
- Click on the “Clear Cache” button.
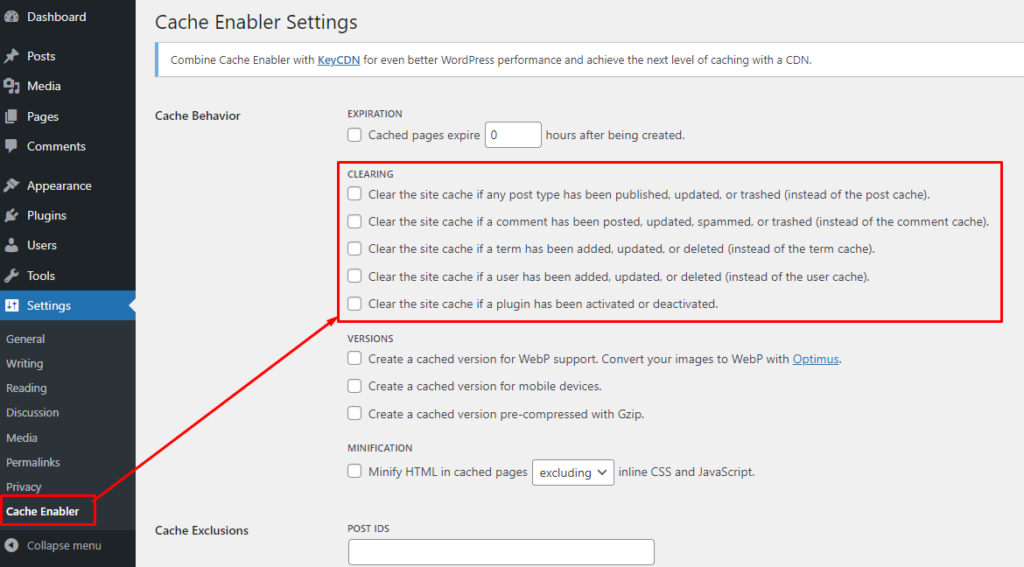
- WP Fastest Cache:
- Go to your WordPress dashboard.
- Navigate to “WP Fastest Cache.”
- Click on the “Delete Cache” button.
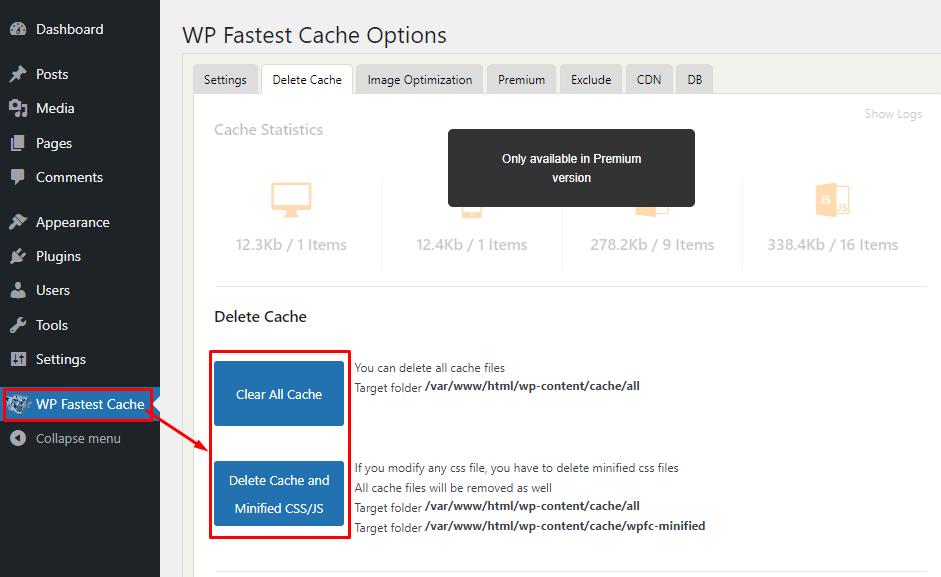
Remember that clearing the cache may temporarily affect your website’s performance while it rebuilds the cached files. Additionally, if you have a server-side caching (e.g., Varnish) or a Content Delivery Network (CDN) in place, you may need to clear the cache through their respective interfaces as well.
If you’re unsure which caching plugin you have installed or face any difficulties in clearing the cache, refer to the documentation of your specific caching plugin or contact your hosting provider for assistance.
FAQs
- Does clearing cache delete any important data on my website?No, clearing cache only removes temporary files used to improve website speed. Your actual website data remains unaffected.
- Do I need to clear cache manually, or can it be automated?Most caching plugins offer automated cache clearing options, allowing you to set schedules for regular cache purging.
- Can I use multiple caching plugins simultaneously?It’s not recommended to use multiple caching plugins at the same time, as they might conflict with each other and cause issues.
- Will clearing cache affect my website’s search engine rankings?Clearing cache can positively impact your website’s rankings, as it helps maintain faster loading times and better user experience.
- How often should I clear cache on my WordPress website?The frequency of cache clearing depends on your website’s update frequency and traffic
